
最後更新: 2023-01-23
在這個年頭,HTTPS 基本上已是網站架設的基本要求:將使用者與伺服器之間的傳輸過程加密,以減低網頁在傳輸過程中被截取內容的風險。建立 HTTPS 連線需要 SSL 憑證(Cert),在過去的時間,SSL Cert 要不需要收費,要不申請繁複,所以令一般使用者、中小企等卻步。Let’s Encrypt 是一個由各網際網路安全研究小組提供的免費 SSL Cert 服務,並得到多間企業贊助。
你在胡爛甚麼?不就是依照官方教學網頁的 Command 照直寫嗎?
沒錯呀,我也知本篇文章不適用於具經驗的人,不過原有的 CertBot 可能會影響網頁伺服器的設定,所以我才特意寫這篇。再者,如果網頁伺服器直接把 HTTP Port 80 的請求,變成 HTTPS Port 443 的話, Certbot 會因為未能認證域名擁有權而未能產生 HTTPS Cert 。
要求
- 網址
- 首先,你需要有一個網址(或「網域」— Domain Name),如 Example.com 、 SemiAlpha.net 。其他如 subdomain.example.com 則未必可以,必須先留意域名的擁有權。
- 網站存放
- 共享網站儲存(Shared Hosting)(部份網站譯為虛擬服器):
大部分 Shared Hosting 均使用 CPanel ,而 CPanel 均支援 Let’s Encrypt,安裝方法不難,但本文不作另行介紹 - 網絡連接儲存(Network Attached Storage – NAS)
部分 NAS 支援網絡架設,而部分廠商(如 Synology)支援自動取得並更新 Let’s Encrypt 的 Cert 。- Synology :首先須在 DNS 中新增一個 Secondary domain 的 CNAME 記錄(如 nas.example.com ),指向 example.synology.me ,再在 NAS 中設置並啟用 Let’s Encrypt Cert 。
- 注:由於家用的 IP 有機會隨時變動,所以你需要一個 CNAME 記錄,指示 DNS 處理 IP 查詢時,指向 example.synology.me 。
- 你不能將主網域(如 example.com)使用 CNAME 記錄。
- 虛擬專屬伺服器(VPS / VM)、獨立伺服器(Dedicated Server)(本文重點)
- 可以使用 Port 80
- 有 Shell Access (即是可以登入打指令(Command)⋯)
- 共享網站儲存(Shared Hosting)(部份網站譯為虛擬服器):
當然, Let’s Encrypt 還有其他安裝方法,不過本文不作詳述,請到 https://letsencrypt.org/docs/ 及 https://certbot.eff.org/ 參考。
原理?
Let’s Encrypt 軟件會在網頁伺服器中,暫時設置一個包含長長的「驗證碼」的「網頁」來確認域名擁有權。舉例來說,如果想為 ssl-demo.example.org 設立一個 SSL Cert ,它就會先設置一個暫時性的網頁:
http://ssl-demo.example.org/.well-known/acme-challenge/<TOKEN>這個 Token 是暫時、即棄的,Let’s Encrypt 的伺服器便會到該網頁查看 Token 網頁內的內容是否與它的指令相同。
不過,因為伺服器的設置不盡相同,有時候亦會有多種複雜的 rewrite code ,會令自動的軟件失效,網主或需要定期手動將伺服器套件(如 Apache 或 NginX)關閉,再執行 Let’s Encrypt 的 standalone 套件⋯
到底方法是甚麼?
正因為 Let’s Encrypt 會將檔案放置在某資料夾中,同時又不知道該資料夾能否被存取,以及有沒有被誤以重新轉向至 HTTPS 環境中(Let’s Encrypt 需要以 Port 80 HTTP 來認證,所以如果已採用 Port 443 HTTPS 的話,便會不成功),自己在撰寫 Apache / NginX Rewrite Code 時可能出錯,所以有時會失敗。
我們將建立一個地方供 Let’s Encrypt 放置認證檔案,以及不令 Apache / NginX 將網址轉向至HTTPS 。
注意
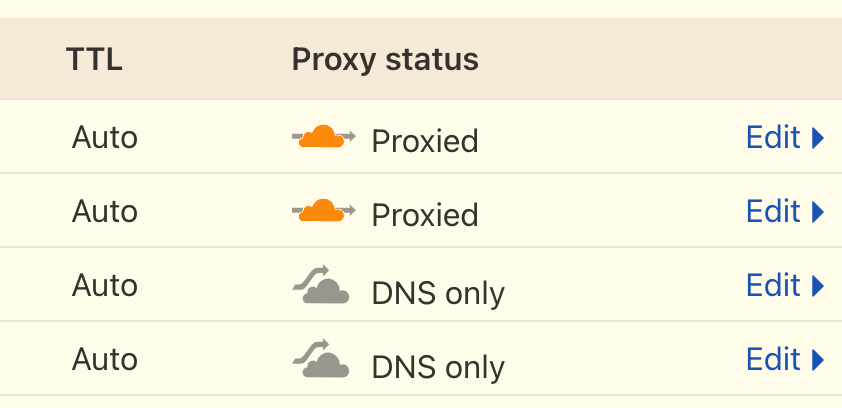
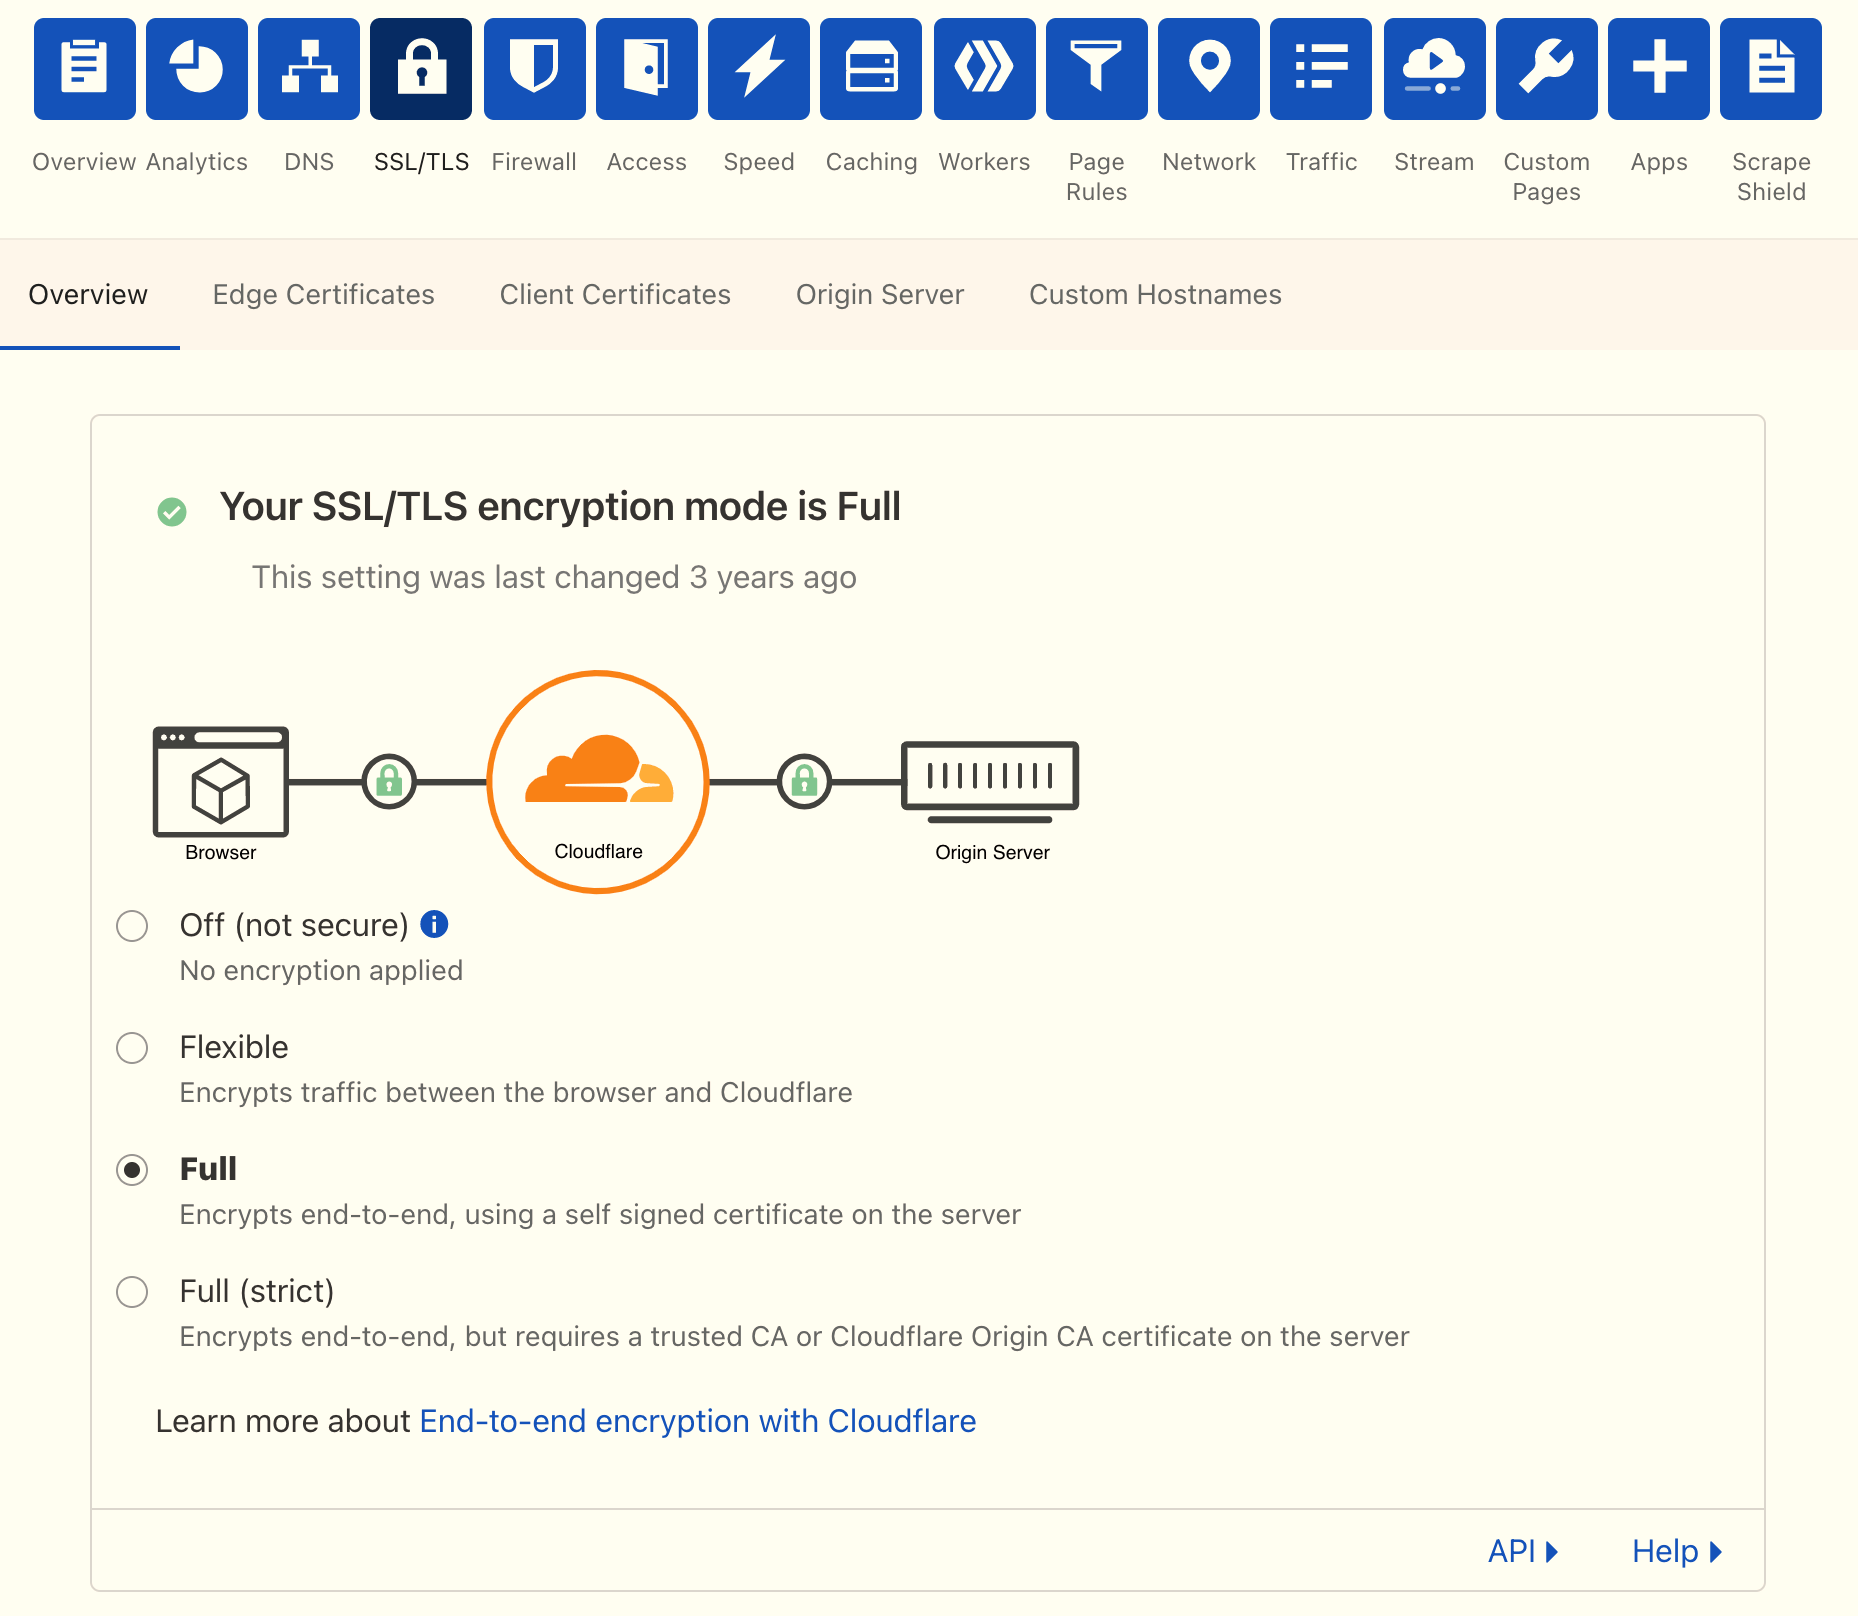
如果你使用 Cloudflare 的 Proxy ,即代表你正使用 Cloudflare 提供的 SSL。你只需要使用一張自行簽發的 SSL Cert ,以用作伺服器和 Cloudflare 中間加密。你可以瀏覽「[進階] 快速自行製作 SSL 證書」,毋須使用 Let’s Encrypt 的 Cert。
不過,你仍需考慮資料傳輸的安全性,可能需要由 Cloudflare 提供或由認可的 CA 簽發的 SSL Cert 。
(這個與 Let’s Encrypt 較不相關,純粹供作參考)
安裝
本文使用 Debian 10 ,並以多人使用的 Apache / NGinX 作教學
參考網址:
https://certbot.eff.org/lets-encrypt/debianbuster-apache
https://snapcraft.io/docs/installing-snapd
首先安裝 SnapCraft
# apt update
# apt install snapd
然後重啟伺服器,再繼續安裝
# snap install core
  > core 16-2.48.2 from Canonical* installed
再使用 Hello World package 以檢視 snap 是否運作正常
# snap install hello-world
  > hello-world 6.4 from Canonical* installed
# hello-world
  > Hello World!   # 看看這裡,是否成功輸出 Hello World
然後安裝 Certbot
假如你之前已經安裝了 SnapCraft ,你確保該套件為最新版本。
# snap install core; snap refresh core再安裝 CertBot
# snap install --classic certbot
# ln -s /snap/bin/certbot /usr/bin/certbot
修改 Apache / Nginx VirtualHost 檔案設定
[0] Apache 、 NginX 相同的預先設定
新增一個資料夾,之後會用作 Let’s Encrypt 認證之用。記得設置適當的權限(chmod)和擁有權(chown)。
# /var/www/html/_letsencrypt/.well-known/acme-challenge/如果你想以同一張 SSL Cert 由多個域名使用(Subject Alternative Name, SAN),你需要執行多次下列步驟。
另外,請先備份原有的 VirtualHost 檔案,以便更改錯誤時可以追找回舊有設定。
[1] Apache 篇
首先,要開啟 SSL Support (Apache) 以及開啟了 mod_rewrite,然後重啟 Apache2 程序。
# a2enmod ssl
# a2enmod rewrite
# systemctl restart apache2
更改/新增一個 Config 檔案(請根據實際需要來更改設定)
# nano /etc/apache2/sites-enabled/001-ssldemo.conf紅色:如果瀏覽 http://ssl-demo.example.org/.well-known/acme-challenge 的話,便會使用伺服器中, /var/www/html/_letsencrypt/.well-known/acme-challenge 的內容
藍色:如果網站開首不是 /.well-known/acme-challenge/ 的話,便會轉向至 HTTPS 。
<VirtualHost *:80>
    ServerName ssl-demo.example.org

    Alias /.well-known/acme-challenge/ "/var/www/html/_letsencrypt/.well-known/acme-challenge/"
    <Directory "/var/www/html/_letsencrypt/">
        AllowOverride None
        Options None
        Require method GET POST OPTIONS
    </Directory>

    <ifmodule mod_rewrite.c>
        RewriteEngine On
        RewriteCond %{REQUEST_URI} !^/\.well\-known/acme\-challenge/
        RewriteRule (.*) https://%{HTTP_HOST}%{REQUEST_URI} [R=301,L]
    </ifmodule>


</VirtualHost>
記得重啟 Apache 伺服器。
# systemctl restart apache2[2] NginX 篇
更改/新增一個 Config 檔案(請根據實際需要來更改設定)
# nano /etc/nginx/sites-enabled/001-ssldemo紅藍說明與 Apache 相同
server {
    listen 80;
    server_name ssl-demo.example.org;

    location /.well-known/acme-challenge/ {
        alias /var/www/html/_letsencrypt/.well-known/acme-challenge/;
    }

    location / {
        return 301 https://$host$request_uri;
    }
}
同樣要記得重啟 NginX
# systemctl restart nginx正式開始
首先嘗試 Dry Run (試運行)
進行 Dry Run (試運行)程序,是為了看看當中有沒有任何錯誤。如果一切如常,沒有錯誤,便可以讓 CertBot 建立一個 SSL Cert ,並由它定期續期 / 更新。
如你只需要一個域名加上 HTTPS 支援:
certbot --dry-run certonly --webroot -w /var/www/html/_letsencrypt -d ssl-demo.example.org如你需要將多個域名都加上 HTTPS 支援:
certbot --dry-run certonly --webroot -w /var/www/html/_letsencrypt -d ssl-demo.example.org -d www.example.org -d example.org當中「/var/www/html/_letsencrypt」是用作放置暫存檔的地方,於本文較早前提及。
請根據指示操作:你可能會被問及電郵地址、要求同意使用條款等。
請留意 CertBot 試運行後的結果,並跟據結果再調整伺服器設定。
IMPORTANT NOTES:
- The dry run was successful.
或
IMPORTANT NOTES:
- The following errors were reported by the server:
真的建立 SSL Cert 了⋯
如你只需要一個域名加上 HTTPS 支援:
certbot certonly --webroot -w /var/www/html/_letsencrypt -d ssl-demo.example.org如你需要將多個域名都加上 HTTPS 支援:
certbot certonly --webroot -w /var/www/html/_letsencrypt -d ssl-demo.example.org -d www.example.org -d example.org完成後, SSL Cert 會被儲存在下列位置:
/etc/letsencrypt/live/ssl-demo.example.org/再次修改 Apache / Nginx VirtualHost 檔案設定
[1A] Apache: Version >= 2.4.8
於剛才的 VirtualHost 檔案的最底中,加入以下設定
<VirtualHost *:443>
    SSLEngine on
    SSLCertificateFile /etc/letsencrypt/live/ssl-demo.example.org/fullchain.pem
    SSLCertificateKeyFile /etc/letsencrypt/live/ssl-demo.example.org/privkey.pem

    ServerName ssl-demo.example.org
    DocumentRoot /var/www/html/path/path/path
    ErrorLog ${APACHE_LOG_DIR}/error.log
    CustomLog ${APACHE_LOG_DIR}/access.log combined
</VirtualHost>
(請按需要更改設定)
[1B] Apache: Version < 2.4.8
於剛才的 VirtualHost 檔案的最底中,加入以下設定
<VirtualHost *:443>
    SSLEngine on
    SSLCertificateFile /etc/letsencrypt/live/ssl-demo.example.org/cert.pem
    SSLCertificateKeyFile /etc/letsencrypt/live/ssl-demo.example.org/privkey.pem
    SSLCertificateChainFile /etc/letsencrypt/live/ssl-demo.example.org/chain.pem

    ServerName ssl-demo.example.org
    DocumentRoot /var/www/html/path/path/path
    ErrorLog ${APACHE_LOG_DIR}/error.log
    CustomLog ${APACHE_LOG_DIR}/access.log combined
</VirtualHost>
(請按需要更改設定)
查看 Apache 版本:請輸入以下指令( Command)
#
apache2 -v
[2] NginX
於剛才的 VirtualHost 檔案的最底中,加入以下設定
server {
    listen 443 ssl;
    listen [::]:443 ssl;
    server_name ssl-demo.example.org;

    ssl_certificate /etc/letsencrypt/live/ssl-demo.example.org/fullchain.pem;
    ssl_certificate_key /etc/letsencrypt/live/ssl-demo.example.org/privkey.pem;

    root /var/www/html/path/path/path;
    # ...

}
(請按需要更改設定)
更新 Renewal Hooks
在更新 SSL Cert 後,需要重新載入 Apache 或 NginX ,以使用最新的 Cert。你需要在 /etc/letsencrypt/renewal-hooks/deploy 之中,建立一個 Script 以重新載入 Apache 或 NginX 。例如先用 nano 建立檔案。
# nano /etc/letsencrypt/renewal-hooks/deploy/www_reload[1] Apache
#!/bin/sh
systemctl reload apache2
[2] NginX
#!/bin/sh
systemctl reload nginx
最後,別忘記需要執行 chmod +x /etc/letsencrypt/renewal-hooks/deploy/www_reload ,令該 Script 能被成功執行。
(部分網站指出, Apache 及 NginX 需要 restart 而非 reload ,方會重新讀取 Cert 。請自己按需要及系統設置更改以上設定。)
更改後,有關 Cert 便會自動更改及應用。若你有其他服務正在使用 Let’s Encrypt 的 Cert ,你亦可以在上面添加相關的 reload (或 restart )步驟,以便自動更新 Cert 。
範例:
(HTTP-不會被導向至 HTTPS) http://ssl-demo.xdxd.biz/.well-known/acme-challenge/hello.html
(HTTPS- SSL Cert 將被自動更新) https://ssl-demo.xdxd.biz
當然,目前市面上,有不少工具都可以幫助站長設置 SSL Cert ,俗稱「虛擬主機」 / 「共享網頁空間」的 CPanel 網頁儲存供應商更提供了自動的 SSL Cert 設定。不過,作為一個小型站長,亦沒有錢去購買逐年計的 Cert 的話,Let’s Encrypt 不失為一個好的選擇。
圖片來源
Photo credit: Visual Content on Visualhunt.com / CC BY